Drones are perfect for hanging up antenna wires in trees. Just hang a small weight connected to a fishing line, drop it where you want it and use the fishing line to haul something heavier up.
The problem is getting a cheap drone that can do the job.
I ordered a very cheap Bugs 3. This one do have an internal camera connector with three pins. One of them changes state when you press the camera button on the remote. Perfect, I thought. The problem was the Bugs 3 is not very easy to precision fly as it has no altitude control.
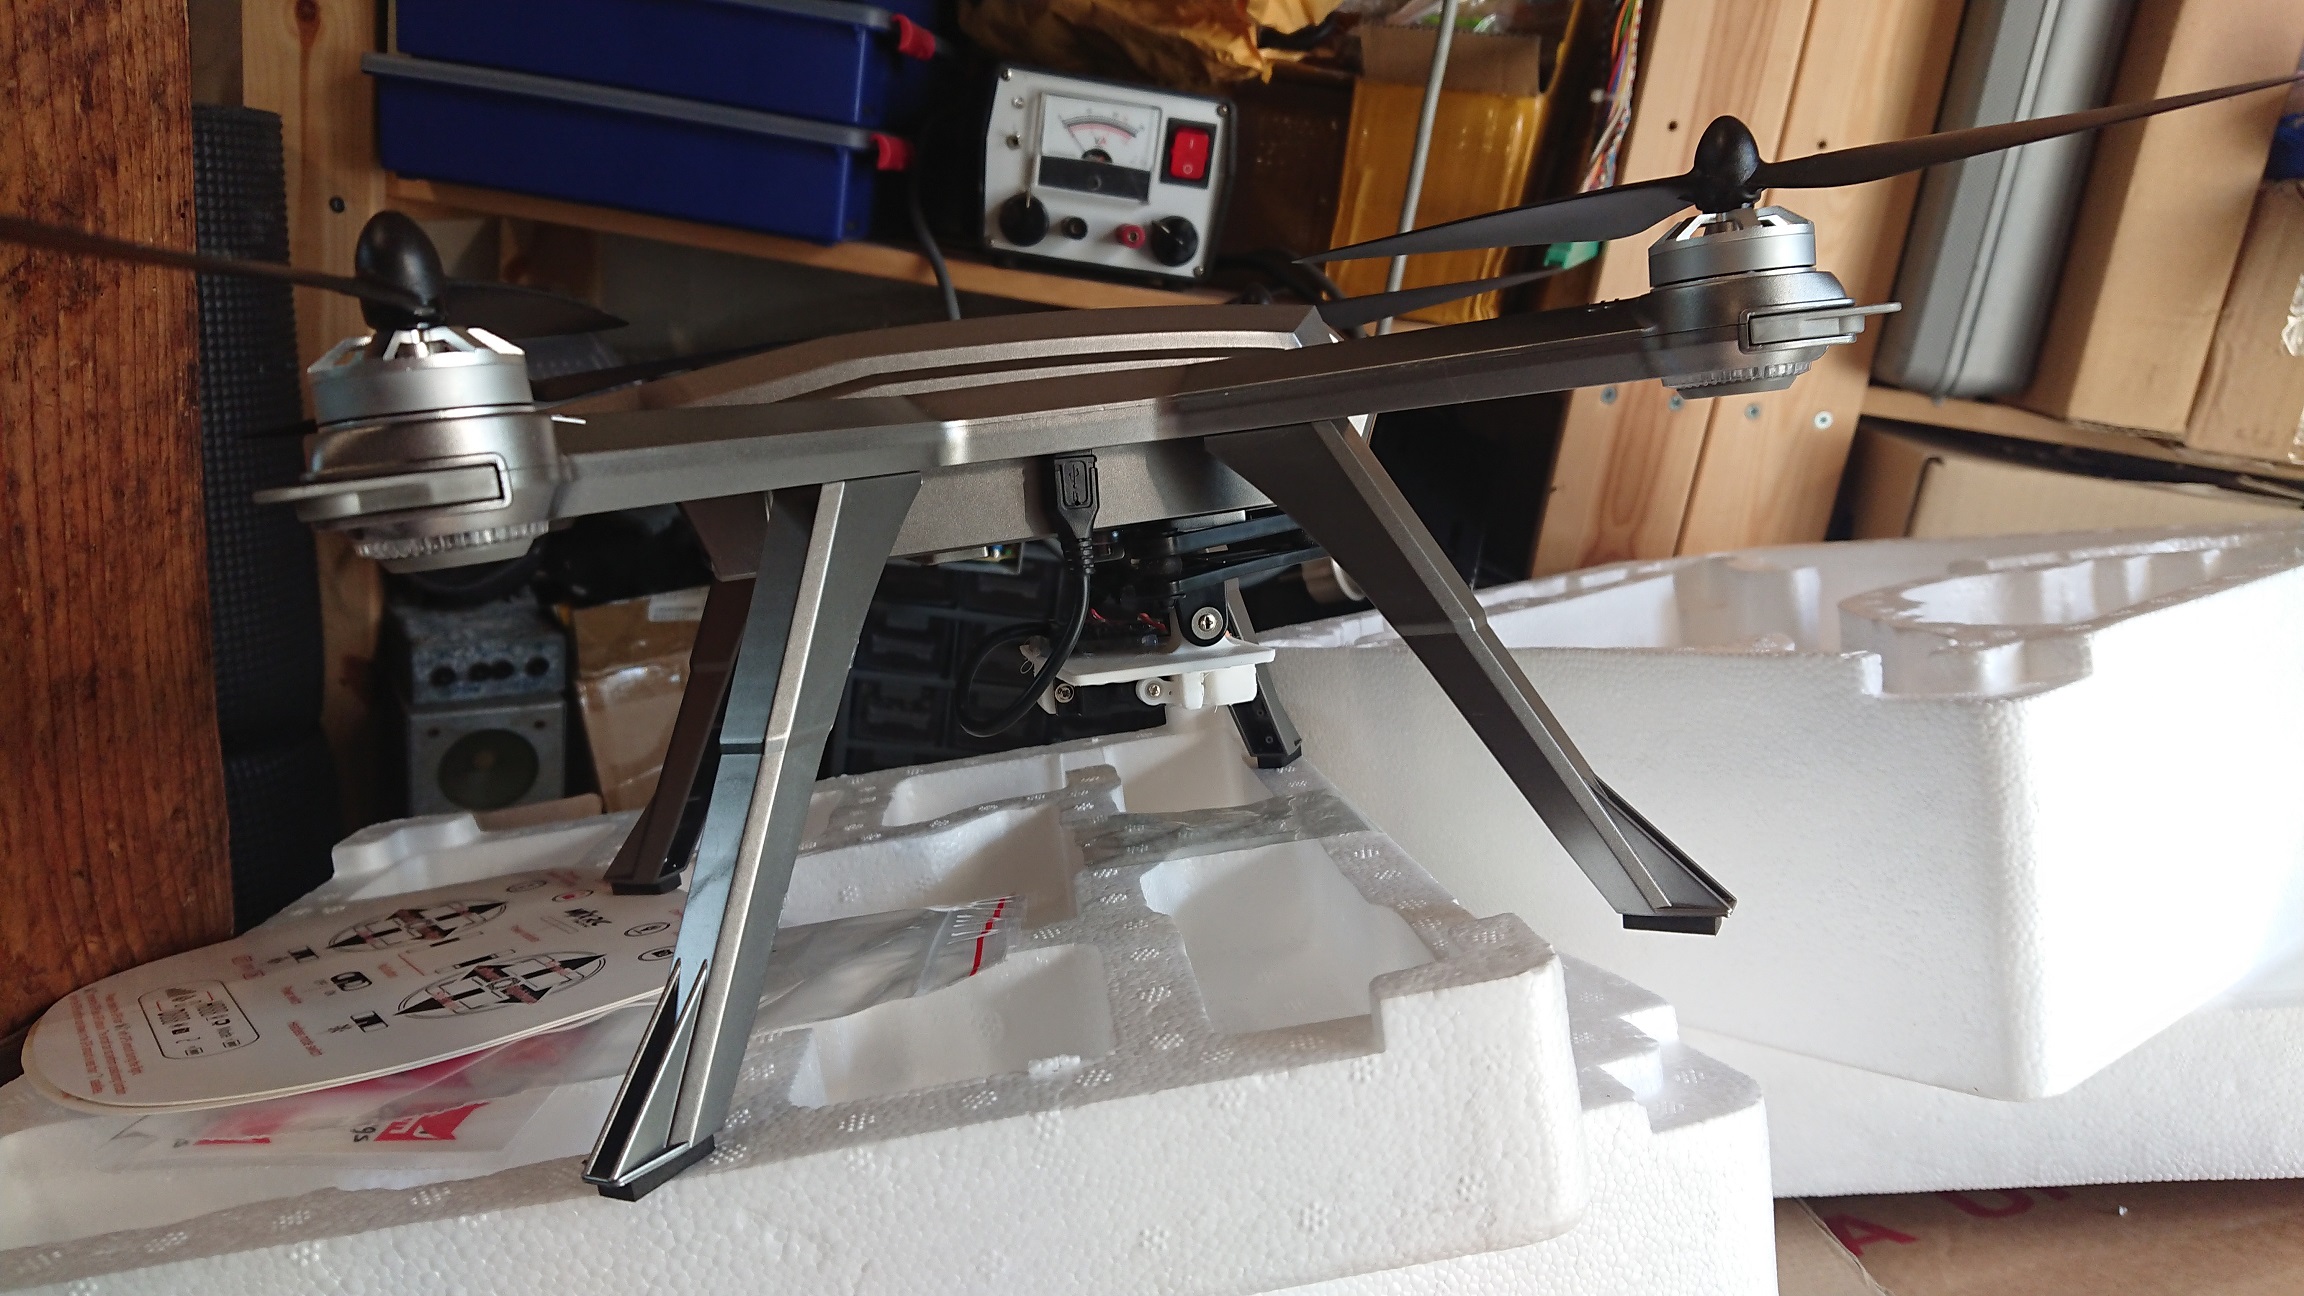
So, on to the next one, a Bugs 3 Pro. This has both altitude control and headless mode flight. A bit more expensive but SO much more controllable. The problem was there was no internal camera connector. There was an empty connector but that seems to be related to the position leds or something. So, what to do…?
There actually was a camera supplied with the Bugs 3 Pro. USB connected, it seemed. But at a closer inspection… The camera is just ordered to take pictures or shoot video. This is put on the SD card inserted in the camera or sent to your mobile using wifi. So, is it really running USB…? Isn’t the USB stack (plus hardware) a bit hefty to put on a drone controller just for the camera?
I hooked up my oscilloscope and apart from +5V and 0V there was some UART communication on one of the wires. 38400 baud. And when I pressed the camera button I got a small data package on the serial line. I hooked it up to an Arduino, no interface HW needed…
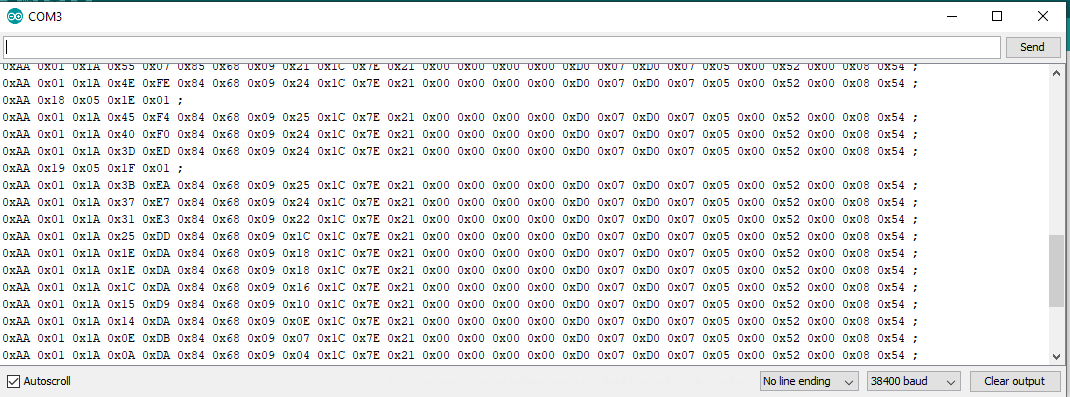
See those short packets? These are the photo packets… Now we just have to catch them.
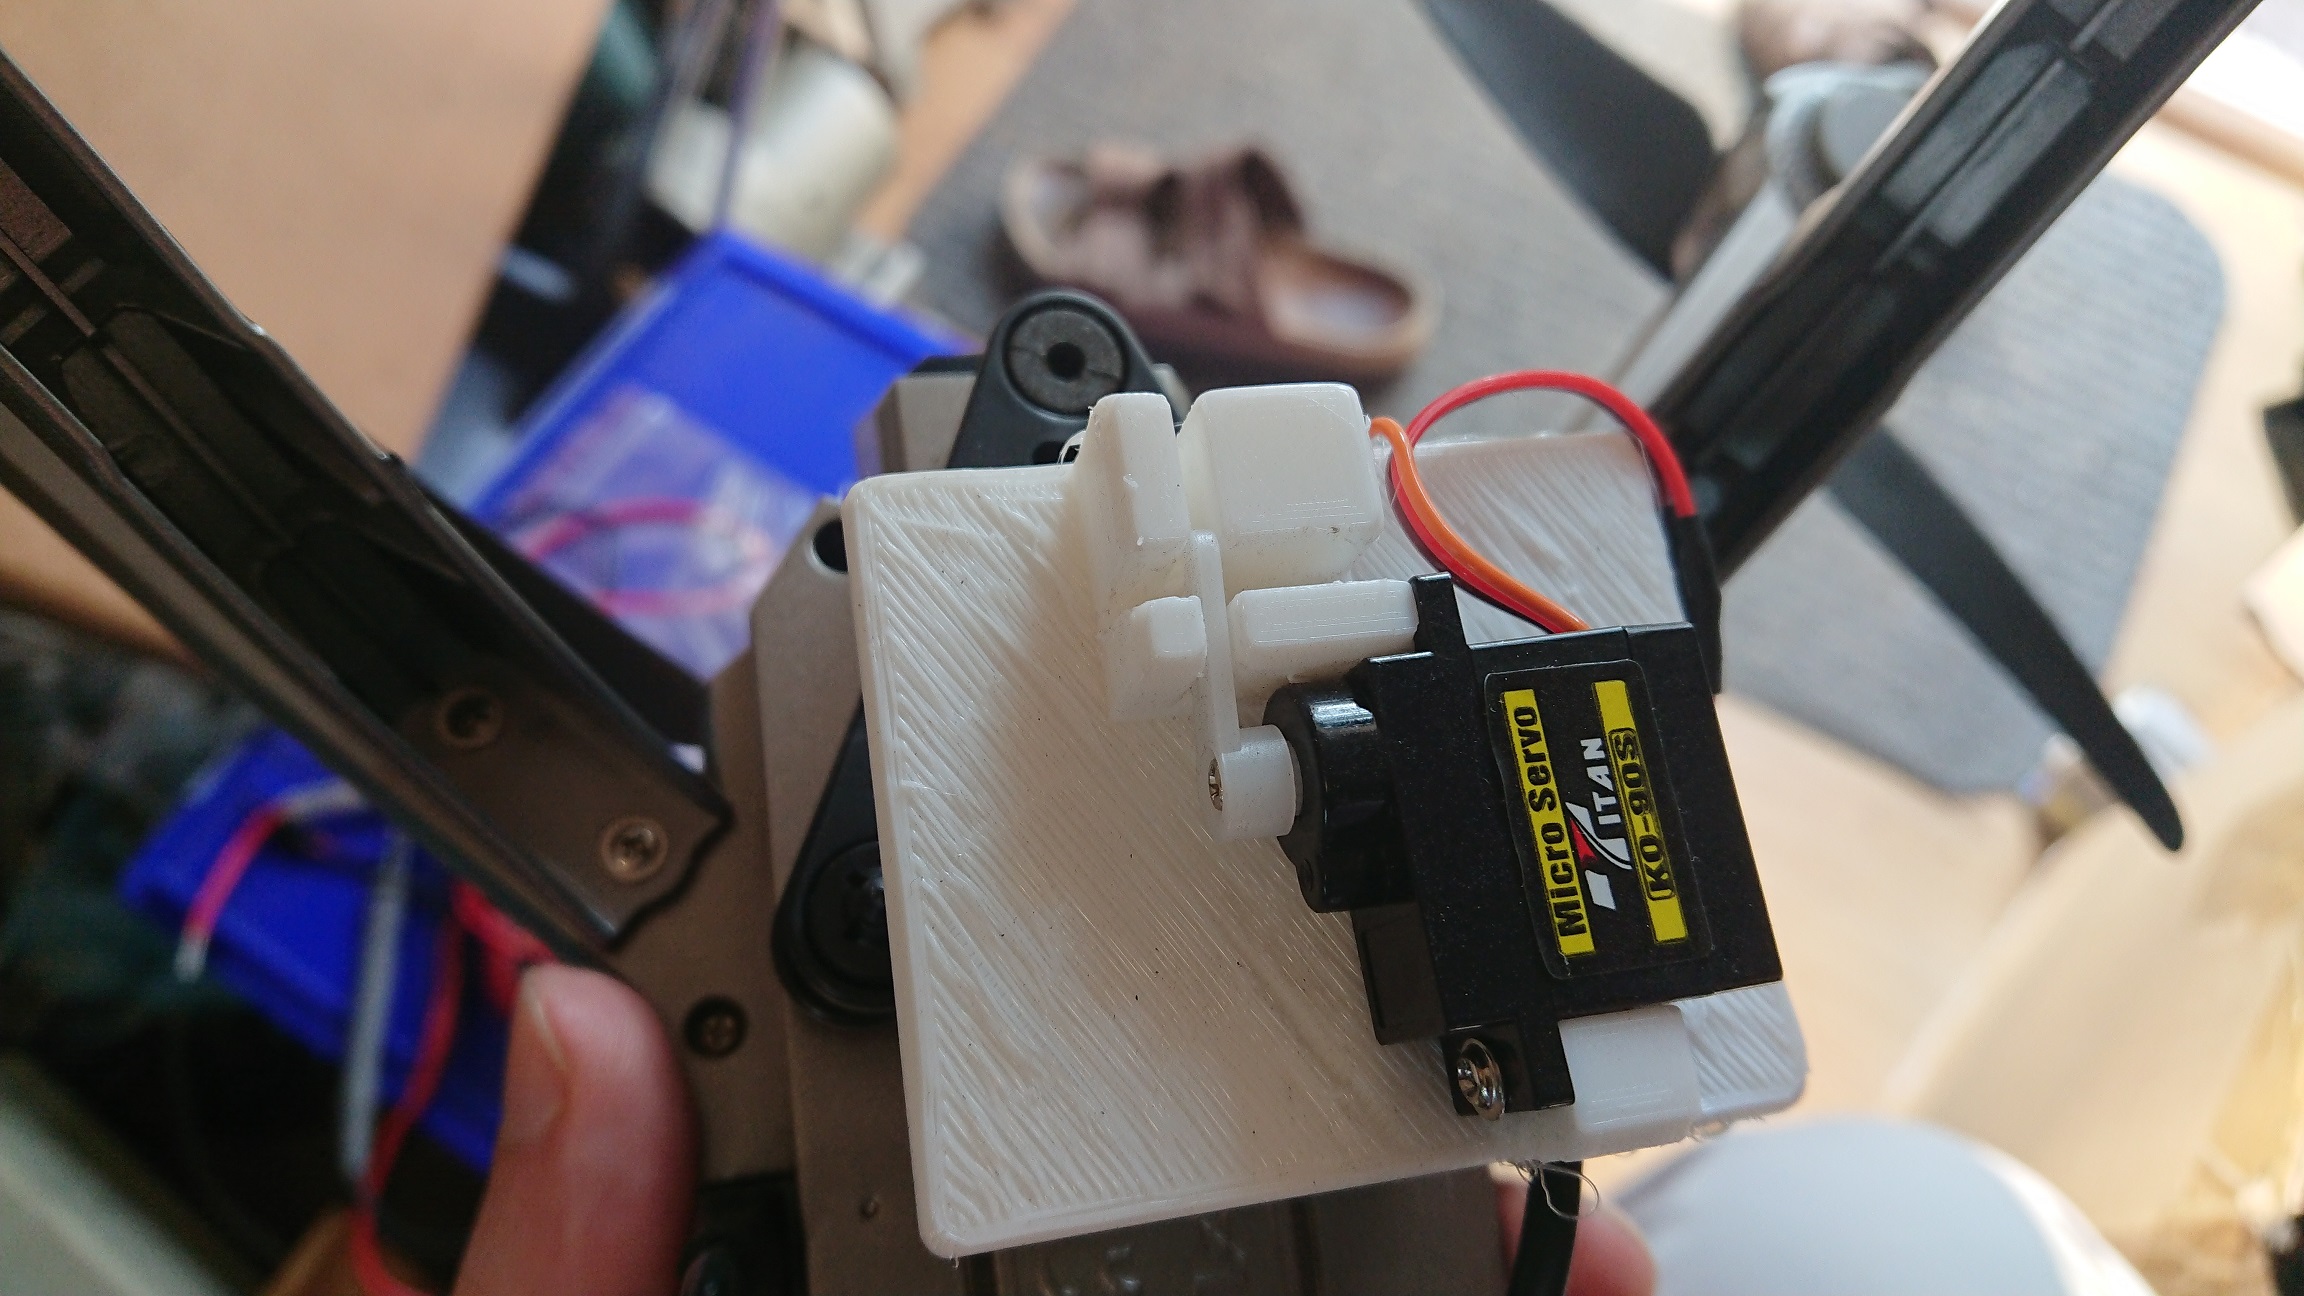
This Arduino code, compiled for a Nano, will listen for the short and long camera key press data packages and control a RC servo connected to pin A0. From the “USB” connector cable I use the 5V (red) connected to 5V on the Nano and 0V (black) connected to 0V on the Nano. The serial port from the “USB” connector (in my case this cable was green, I don’t know if this is standard) can be connected directly to the “RX” pin of the Arduino. You cannot update the Nano with new software while having the drone connected.
The power for the RC servo I stole from the drone battery. I used 3 diodes in series, 1N4007. Type is not critical but it should take some current (1A in my case) and the voltage should be dropped from 7.2 to around 5V for the servo to be happy.
Ok, servo working fine attached to the Arduino and drone… Now we need some mounting stuff for it all. I threw this together for testing.
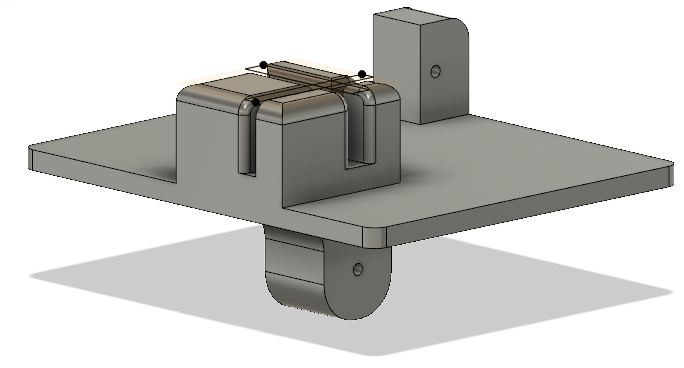 The bottom fits the camera mount supplied with the Bugs 3 Pro. A little hard to 3D-print but it works…
Here is the STL for the servo holder.
Stuff you need (apart from tools):
Arduino Nano with developing tools
3D printed servo holder
USB cable to cut
Micro RC servo